Pages

Saturday, November 30, 2013

Free Photo Editing Software iPiccy

I am in full on decorating mode here at Sweetwater!
The house is a disaster.....boxes.....ribbons....greens....
I will share some of the decor in the next posts....
BUT....
I discovered the coolest on line Photo Editing Site and just had to share with you!

 These are a couple of collages that I made!
Super simple and intuitive to use!
 The images above are snaps of the decor in the kitchen!
I am especially loving the Goodwill copper bowl filled with the stuff I took out of the cornucopia and the gorgeous Goodwill pears!
The wreath was a bit tricky to hang....good that the Sweetwater daughter stopped by to be my spotter!
I always lean a seasonal image in the back of the stovetop!
The little bells hung on the back of the chairs are sure to bring Marvin fun times!


I found the cutest Christmas card with Santa scratching the kitty....
hey...every cat needs art when they eat!
The other prints are also framed Christmas cards....
The bell swag is a cheerful sound coming and going through the garage!


iPiccy
Now back to iPiccy

At first I thought that it would be pretty basic!
But the professional touch up tools are almost as good as some in Photoshop and so much easier.....

The one draw back is that there is no straightening tool....so I still used iPhoto for that...

Anyway....just had to share and think it is worth your time to take a look!


Now back to the boxes....and greens...and bows OH MY!

Have a Great Day!


Sunday, November 24, 2013

Decorate Your Refrigerator in Style!


I have to admit something that might make some of you roll your eyes.....

 I absolutely refuse to clutter up the refrigerator with the collections of family photos, coupons and notes!

I think it is probably my cluttered brain that can't handle MORE clutter in the kitchen....but hey I don't mind looking at this clutter in OTHER PEOPLE'S kitchen....REALLY....

In fact....I often find myself enjoying those same collections of STUFF in OTHER PEOPLE'S  kitchens and thinking....WOW....they have such interesting lives!!!


The other morning I was looking at the bare white side of the refrigerator which abuts the computer desk where I spend "A LOT" of my time!


Now even for me.....this was a bit on the sterile side!!!!

HMMMMM....what to do?


This is the simple and easy solution I came up with!


A framed Christmas Card....of a cityscape in Winter....


6 round (pretty strong) magnets glue gunned (is that a word???) around the perimeter....
I already had some in my "craft stash", but I might just buy some more!!!


And in less than 10 minutes.....and a few trips up and down the basement stairs to see if I had used enough magnets  (until Mr. S suggested that I try out the magnet strength on the BASEMENT REFRIGERATOR...instead of walking up and down the stairs...well duh!)
I now have an uncluttered but less sterile refrigerator to look at!


Oh....by the way.....at Sweetwater we DO have all those pieces of daily life around here...
this is the solution I have come up with that doesn't make me crazy!!!

It looks to me like this could use some organizing too!!!! 
A project for another day!!!
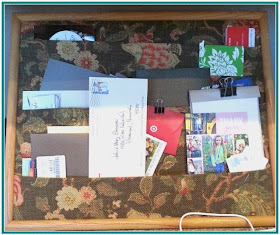
Here is a post with the Tutorial for making this message board!

Back to the framed art on the refrigerator...
I am imagining all kinds of ways that this could work...
Framed pictures of kids.....
Framed pictures of vacations....
Collages.....Scrapbook Pages....

Leave a comment with YOUR ideas.....or slap me down for being such a refrigerator SCROOGE!

Have a GREAT DAY!


Saturday, November 23, 2013

Christmas Tree Decor Ideas!


Well.....Here it is!

The completed Mitten Tree created for the Festival of Trees Gala!

We had soooo...much fun creating this tree!

The total cost minus the pre-lit tree:
$150!

Now....I still think that is a lot of money....
the big ticket item was the Nordic Throw for the tree skirt and the hardcover copy of the book!

The ornaments were almost free.....
The mittens were made from $30 dollars worth of Goodwill sweaters...
The big bows were $15 worth of ribbon from CostCo....
A little raffia...or I guess a LOT of raffia....
Some scented pine cones from Michaels...

And there you have it.....a pretty darn cute tree!

The Sweetwater Son asked me why I don't have a themed tree like this AT Sweetwater???

HMMMM.....maybe it is because I still think $150 is a lot of money for a tree....!!!


Watching the other tree designers was a lot of fun.....and a learning experience!  

Here are some images of some of the other trees at the festival!


Now....these trees are a bit on the glittery foo foo for me....but they are gorgeous!

What I did Learn:
  • BIG is better.....and very effective....some of the ornaments on the trees were full sized snowmen and stockings....
  • Wrapping tulle through the branches adds fullness and a big effect for little effort!
  • All of those BIG branches of artificial "STUFF" stuck in randomly in sprays is really pretty!
  • Some people like GLITTER a LOT more than I do!
  • Winding garland of grape leaves and bunches of grapes make a gorgeous "winery" look!
  • A Thematic color scheme makes even the simplest tree look pulled together!!!


 What I might of done differently for our tree:
  • BIGGER mittens might have been fun!
  • BIGGER wooden circles might have been more of a WOW factor!
  • You live and learn!
Oh...and the GALA was lots of fun too......check out the cute little chicks that followed me home from the Silent Auction!


Have A Great Day!

Wednesday, November 20, 2013

Super Easy Tip: How To Hang A Sweater

All those trips to Good Will mean that there are lots of sweaters in my closet.....
I have a "couple" of drawers full....
I have a "couple" of under the bed storage bins full....
I DIDN'T have "hangers" full of sweaters because I have never been a fan of shoulder "nipples"!
You know...the bumps that happen when you hang up a sweater!

So when a friend showed me this trick....it was an "AH HA" moment!
This is how to "fold" a sweater over a hanger!

Start by folding the sweater in half along the center!


Lay the hanger on the sweater so the hook is in the armpit! 


Fold the arms over one side of the hanger!

Fold the body over the other side!


AH HA....a perfectly folded sweater on a hanger!

I think I will only use this for my really bulky sweaters.....
I don't think it would be a good idea for Mr. S to actually see ALL my sweaters in the closet!!!
Better if some of them are behind closed "Drawers"!

Have A Great Day!


Link Parties

FLuster Buster  Katherine's Corner     

Sunday, November 17, 2013

Oh Christmas Tree!-An Update!


Wow....the Festival of Trees event is next Friday night.

The Sweetwater Daughter and I will spend Thursday afternoon decorating the tree we have designed!

All of the parts are ready.....

I thought you might like to see the way we have organized our plan so that on Thursday we can put the whole thing together quickly!  (at least that is the way we envision it)


Working "on-site" away from the Sweetwater Supply closet is always a challenge!
I am starting to put together a "tool basket" to make sure we have what we need!


From 5 GoodWill Sweaters to 40 + Mittens.....

DONE!
With raffia added to make it easy to tie them on the tree!


 From slices of wood....to cute little ornaments....ust 2 coats of ModPodge.....and an eye hook.


We are still trying to decide whether to hang them with ribbon or raffia...probably raffia!


Lots of bows got made one night last week.....with a little help from a friend!


The secret to making these gorgeous bows can be found on the tutorial post from a few years back!


This Nordic inspired throw from HomeGoods sure has the Jan Brett look!


We have a copy of the book....it will go under the tree tucked between a couple of birch logs....

Now.....we just need to buy some of those wonderful pinecones from Michaels....the cinnamon smell is enough to make me drool!


So as you can see.....all the parts are done.....


We keep saying to ourselves....this seems toooo easy.....so I guess we (and you) will find out next week when we carry it all to the warehouse and start putting it all together!

We are proud to say that at this point we have spent way way way less than the $400 dollar allowance....like maybe way less than HALF of that!  All that money we didn't  spend can go back into the coffers of the charity!


Have A Great Day.....and wish us luck!

Monday, November 11, 2013

Cornucopia 2013


 Cornucopias or a Horn of Plenty are the epitome of Thanksgiving decor.

I put one together each year....

Every year it looks a little different.


Here is a trip down memory lane to see the last couple of years of Cornucopia Design!

How to Arrange a Cornucopia Tutorial

The Cornucopia done for a silent auction last year


This is the one that sat on the dining room table last year.....and the post about it HERE gives the history of cornucopias as well as some tricks for doing the arrangement.

This year.....I had a new wicker cornucopia....from GOOD WILL of course...
I saw a lovely mum plant in the grocery store that was the perfect orange color for the kitchen....
HMMMM....I knew that it would be a great base for Cornucopia 2013!

I began by putting the mum plant into the center....yeah I know it is on it's side...but it is freshly watered and will only need a drink every week or so....and because the whole thing is on a tray it will be simple enough to lift it up to water!  (at least that is the plan :)  )


I love the way the flowers and fruit look don't you?


I decided to use the real fruit that is always just sitting around....and yes....we will eat this and replace it with more!  By the way....those pears are actually FAKE....I bought a whole bag of them at GW for $7....they look amazingly real!  Mr. S even tried to eat one the other day!!!


The real trick for doing this is to put the whole thing on a base....this year I used a silver tray because of the whole thing with watering the fresh plant.  The reason for the base....is to be able to move the arrangement when it gets in the way....which since it is on the kitchen island is whenever we want to cook!!!!


So this is the pretty sight that greets us when we walk in the kitchen.....Nice don't you think?

I hope this inspires you to try to arrange your own Horn of Plenty....
Link up your own creations in a comment...I would love to see them!

Have a Great Day!

Saturday, November 9, 2013

Winterizing the House....The Fairy House That Is!


The Fairy Garden made from an old tree stump was a fun summer project.


A few elements got added throughout the season...

A little bench....
Some little succulents...


 An ivy covered archway to enter the garden....

Nothing spectacular....but also....nothing that cost ANY money!


These darling little creations were handmade gifts given to me by a friend.


She creates them by painstakingly forming them from polymer clay....painting and varnishing them!
Wow!  I keep telling her she could sell them....in fact when she gave them to me...we were at a school meeting and she sold a bunch to the other people right on the spot!!!  What talent!

As cute as these are.....I was afraid that the Minnesota Winter would be too hard on them to leave them outside!


PAUSE.....for a Sweetwater Script!

Scene:  Beautiful Autumn Saturday afternoon just made for doing yard work.  Mr. S and a friend are out in the yard taking care of the leaves in the gardens and yard.  I am happily puttering around in the house.

LOUD DOOR SLAM!

Mr. S:  Mary! Mary! We have a problem!
Me: What? Is someone hurt?
Mr. S: No.....but  Geoff just blew all the Fairy Garden stuff into the yard with the leaf blower and I need to know what to look for!
Me:  Ooooh.....Noooo!  Just kidding!  I already took all the little things into the house!  Didn't you see the indoor Fairy Garden on the counter?
Mr. S:  Well, thanks for telling me!

ANOTHER LOUD DOOR SLAM....GOING THE OTHER WAY!


Wasn't it fortunate that earlier in the day I created this little indoor version of the Fairy Garden!
And wasn't it fortunate that Mr. S. didn't have to crawl around in the yard on his hands and knees searching for Fairy Garden ornaments.....although that picture might have been worth a thousand words!!!

It was good that I did this!  Because......just a few days later.....
 The snow came......

Here is an indoor Fairy Garden that was made by the same friend who crafted the little clay ornaments!

Both of these would be simple for you to replicate.....so.....let the Fairies be with you this weekend!

Link Parties
Get Schooled Saturday   Gloriously Made