Sunday, December 9, 2012

BIG No Cost Wreath!


What's Wrong with this picture?


Nothing...except....when I went to get that beautiful big wreath out of the closet......

I couldn't FIND it....

How can something that big.....

DISAPPEAR.....???

Go FIgure.....but it is NO Where to be found!!!!


Michael's has a replacement for $40....and that is half off.....NOT Sweetwater Style...since the "missing" wreath was a $10 GW find many summers ago....SO there will be no wreath in the front window this year...


This will have to do!!!

Now on to making a BIG wreath....FOR NO Money!

The big sturdy grapevine wreath is the base.....


This has been around for a lot of years....and seen lots of reincarnations....

The greenery from Home Depot was FREE....in fact....when we went yesterday....
the guys kept telling me....take MORE!!!!

I just cut small clusters of greenery and stuck it into the grapevine...
and kept at it until the grapevine was covered evenly....


Because the wreath will be out there "blowin' in the wind"....wrapping green floral wire around the whole wreath to secure the greenery seemed like a good idea!


The white frosted pine cones and bright red ribbon were all in the "holiday stash"....


Not bad for free......!

Now if anybody has any ideas where my other BIG wreath might have disappeared to....
let me know!

Have a Great Day!

Saturday, December 8, 2012

Revisiting Christmas Posts


 I have to say....I am a little behind with Christmas Decor at Sweetwater this year....
I think the idea of the extra week between Thanksgiving and Christmas fooled me...


  Luckily....the Adopt-A-Family project got "wrapped up" and delivered yesterday....


So....instead of "NEW" stuff, I thought some of you who are new to Sweetwater Style might enjoy some links to some of the holiday posts from last year...

If you are a long time reader....my apologies....

.and I promise some NEW stuff SOON!


My Holiday Laundry Room


Since I spend way too much time in the laundry room....it makes sense to put some holiday cheer here!

Don't you love that the cats get some decorations too?


 Holiday Decor on the Mantle....Courtesy of Goodwill!

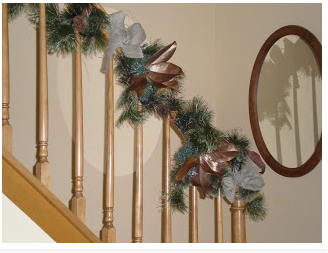
This post shows last year's mantle and staircase in the family room.

Green and Red aren't an option for this room....so using browns, copper and burlap is a nice option!

Can't wait to show you this year's scheme....almost finished!


Last Year's Kitchen Decor at Sweetwater

If you are like me, you spend plenty of time standing at the kitchen sink....

A pretty holiday vignette makes doing the dishes a little less of a chore!

This post includes a tutorial for drying oranges.....enjoy!


Holiday Hydrangeas 

I am kind of done with Hydrangeas this year....I hardly have any new ones and the old ones are pretty crumbly!

Still the mirror in the dining room did look pretty last year...

One thing is for sure.....there will be NO casual arrangements on tables where "Marvin the Terrible" can reach them....

Instead....I am putting the hydrangeas in the outdoor planters....away from curious little kitties!!!!


Stairway Decor  Tips


One of the fun things about revisiting these old blog posts.....

I have a visual record of how things looked last year!


Since I really liked the family room stair treatment last year....I did almost the same thing again this year.


But.....I realized that I have done the very same thing for too many years on the front stairway.....


Time for a change.....I will post photos soon...


This year...these swags found a new home on the basement stairway.....


Decor For the Boys - If you have "men" and/or "boys" in your world....check out this post from last year that shows some fun ways to decorate with them in mind....
 Go figure.....those musty antlers....hiding in the back room are TRENDY....!!!!

Last but certainly not least....
Check out this post with some great Christmas Books For Kids...

Now....
I am back to decorating for THIS year....
I promise you some new content soon...
Like tomorrow???!!!

Have a great day!


Tuesday, December 4, 2012

Holiday Greens for NO $$$$!


Fresh Greens are the foundation for almost all Holiday Decor!

You can buy them.....

Yeah....and I'm gonna spend that kind of money for a decoration....NOT!
 BUT...

I do  have LOTS of greens....


 I will let you in on my little secret for getting a whole pile of holiday greens for
 NO GREEN$$$$$!

HOME DEPOT....yes....HOME DEPOT!

If you go to the Christmas Tree area at Home Depot....they have a scrap bin filled with all the greens that get cut off of the Christmas trees before they sell them...

They let you take AS MUCH AS YOU WANT....
FOR FREE!

OH me...OH my!
What a deal.....

I stopped in to get a trunkload a couple of days ago....
I watched in amazement as this very intelligent looking woman picked through the bundles of greenery for sale ($10 a bunch)....she glanced over at me....loading up my cart....and "go figure" she kept right on picking out what to buy!


So for absolutely NO money.....here is how the front of Sweetwater got the holiday treatment!


 Save those pinecones from year to year.....they make great accents for your decor!


Since the dried Hydrangea would be a "Marvin Target" indoors this year....
they went outdoors to the pots on the front steps.
The redwood twigs were clipped from the yard!


That is Marvin peeking out the front door!!!

I used the great tutorial for porch lights that Diane over at In My Own Style posted...
It is one of the pins on my "Blog Party Ideas" Board...

Her simple trick to use a base of dry floral foam for the greens resulted in an easier...
and prettier look for the 5 front lights...

Seriously....without the "free greens", these babies would definitely be bare this season!

But instead.....they glow with Holiday Cheer!


Get yourself to Home Depot NOW!!!!
Enjoy....

Link Parties

Thursday, November 29, 2012

Put A Bow On IT! Fancy Bow Tutorial!

Ribbon and bows are important elements in the Holiday Decor here at Sweetwater!

I pretty much put a bow on EVERYTHING....and if something comes with a storebought ("gasp!") bow....I probably change it to a homemade bow!

What follows is essentially a repost from last year.
It has tips and a tutorial for making your own gorgeous bows.


I love Costco for lots of things....but I REALLY love their wire edged ribbon!


During every major holiday season they have beautiful wired ribbon at ridiculously cheap prices.
How cheap? $7.99 for 50 yards!
And the patterns are amazing....not always Holiday themed either!

While I was buying mine, I saw a couple buying every spool of one design....they told me it was for their wedding! Very patient groom taking the whole display apart to get enough spools!


I went down to the ribbon stash!
Dug around and found other Costco Ribbons....


I must really love you my bloggy friends, because I am risking having Mr. Sweetwater see how much ribbon I have!
"Really dear...I will use it all someday!"


 People who know me, know that I put bows on everything...


Tooo funny....I was looking for pictures of pretty bows to add to this post and I found this site:
christmastreewreaths
You can buy a a pre-made bow like this for a mere $8.50....or go wild and buy 12 for $102.00!

It always amazes me that people really buy stuff like that....go figure!


Here is mine using the Costco ribbon!

Now....you do the math!
$8.00 for 50 yards of ribbon.....2 yards per bow.....hmmmmmm!

I have put some links to bow making tutorials at the end of the post....


but now you get to see my lame attempt to show you how....
holding the ribbon, the wire, and taking pictures.....now THAT was a trick!


Start by cutting a piece of florist wire about 12 inches long....

If you don't have any paddle wire like this...GET SOME!  NOW1  You will use it and use it and use it!


Leave the ribbon attached to the spool and pull out about a yard.....

If you cut now...you might not have enough for a pretty bow....and besides...if you mess up...
just let go and start again!


Make a loop that is half the size of the bow you want....

pinch it tight....


flip over and make a loop on the other side that is the same size

pinch that tight


Keep going back and forth....
loop, pinch, loop, pinch


This bow has 5 loops on one side and 6 loops on the other.....


I read somewhere that you should always have an odd number of loops....but who's counting? Oh...ME!


Now take the piece of wire and wrap it around the center....whew!  You can let go of the loops now and hold on to the wire.


Twist the wire around about 3 times to get an nice tight center.


NOW....you can cut the bow away from the spool!


Then start pulling the loops up and twisting them into a pretty shaped bow.

The wire in the center lets you have at it without worrying that the bow will come apart.

The wire edge of the ribbon lets you shape the loops.
There you have it! 

Here are the other links I found with much more professional tutorials....take a look!

Better Homes and Gardens Video Tutorial
Directions for lots of fancy bows
Bowmaking...with yardage chart


Hope you give this a try!


Related Posts from ME!

Bows Bows Bows
TIme Saving Gift Wrap Tips

Folded Gift Bag Tutorial


Linky Parties
Made in a Day Katherine's Corner  Gingerbread Blog  The Artsy Girl Connection   
Serenity Saturday  Sew-Licious   Alderberry Hill     
The Dedicated House 

Sunday, November 25, 2012

Pottery Barn Poinsettia Pillow Knock Off

I love this pillow.....don't you?


But....it certainly isn't Sweetwater Style to pay $30 for ONE pillow...
Especially when I have all the ingredients in my "stash" to make one for almost FREE!

The Knock off version has been on my Pinterest "Blog Party Ideas" board for a year!
Time to get busy....

This great tutorial provided by Steph over at Crafting in the Rain
was simple to follow!


I had some white felt.....and I cut the pattern pieces out....so far so good...but it just didn't seem substantial enough!


Then, I remembered that I had a Geiger boiled wool jacket that I picked up from GW for $5...

It was worn and shabby....I bought it for the fabric....


Thought I would use it for mittens or something...


The white boiled/felted wool was PERFECT for this project!


The Pottery Barn version is linen.....and I didn't have any linen.....but I do have a lot of burlap!

Since no one is going to actually USE the pillow......the rough texture of the burlap isn't a problem.


The jacket even had these little gold buttons that were perfect for the center....

Not too shabby....
Actually it is "Shabby Chic" don't ya think?

I have a trip planned to GW later today...I need to keep an eye out for some other fabrics that would work to make a couple of these for gifts.....or maybe a GiveAway!

I will keep you posted!

Have a Great Day!


Related Posts Plugin for WordPress, Blogger...